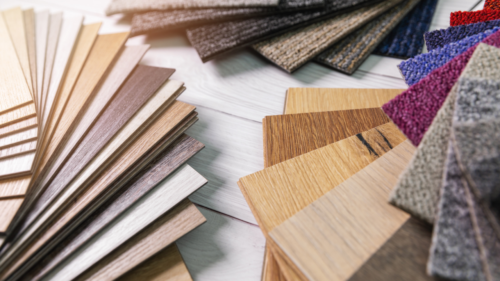
Flooring plays an integral role in defining the aesthetics and functionality of any space.
Whether it’s the warm feel of hardwood underfoot or the sleek appeal of polished tile, the flooring choice speaks volumes about the design sensibilities of a place.
However, equally crucial is mastering the transition between these flooring types.
A well-executed flooring transition enhances the visual flow between rooms and even boosts the property’s value.
For homeowners, designers, and builders alike, understanding the various flooring transition types is pivotal to ensuring every inch of the floor complements its neighboring space.
Understanding Flooring Transition Types:
T-Molding Transition
This transition, shaped like the letter ‘T’, seamlessly bridges two surfaces of identical height.
Whether it’s from hardwood to laminate or tile to tile, T-Molding offers a harmonious transition.
Common materials include wood, laminate, and even metal, lending versatility to various design preferences.
Reducer Transition
When two floors have different heights, a reducer transition smoothly connects the two.
Design nuances, such as color matching and width considerations, ensure the reducer blends seamlessly with both floorings.
Threshold Transition
Typically seen in doorways or where a particular flooring type concludes and another starts.
Threshold transitions not only offer a neat finish but also provide added protection to flooring edges.
Stair Nosing
Transitioning isn’t just about horizontal spaces.
Stairs, a blend of vertical and horizontal surfaces, demand attention too.
Stair nosing ensures that steps are clearly defined, promoting safety and aesthetic charm.
Flush Stair Nose Transition
While regular stair nosing protrudes slightly to define each step, a flush stair nose transition aligns perfectly with the floor, offering a cleaner look.
The choice between the two depends on design preference and safety considerations.
Choosing the Right Transition for Different Flooring Types
Different flooring materials dictate the kind of transition used.
For instance, transitioning from hardwood to tile might involve a T-molding or reducer, depending on height differences.
Meanwhile, carpet to laminate could employ a threshold transition for a neat finish.
Seamless flooring transitions aren’t merely about connecting one space to another.
They’re about complementing and enhancing the individual qualities of different flooring materials.
Here’s a closer look at the best transitions for popular flooring combinations:
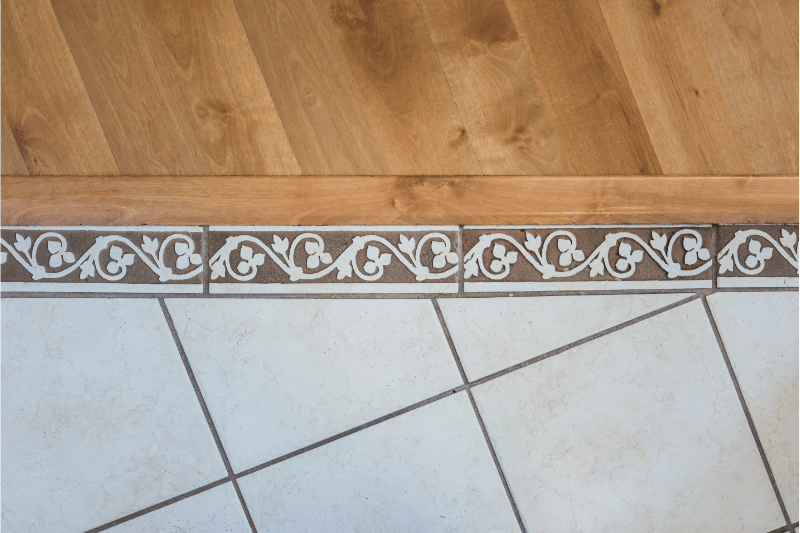
Hardwood to Tile
One of the most common flooring combinations, especially in open-plan homes, is hardwood meeting tile.
Depending on the height of the two materials, a T-Molding transition works excellently if both floors are level.
However, if the tile is slightly higher than the hardwood, a reducer transition will offer the best blend.
Carpet to Laminate
Transitioning from the soft plushness of a carpet to the sleekness of laminate can be a design challenge.
A threshold transition is typically used here, providing a clean border between the two, preventing carpet fraying, and allowing the laminate to expand or contract with temperature fluctuations.
Tile to Vinyl
Vinyl flooring, known for its resilience and flexibility, often meets tiled areas, especially in kitchens and bathrooms.
Given the potential moisture in these areas, a threshold transition is essential.
This transition prevents water seepage, offers a barrier to potential moisture damage, and provides a neat visual finish.
Laminate to Hardwood
While both are wooden-based materials, their distinct textures can create a disjointed look if not transitioned correctly.
A T-Molding transition, especially one that matches the tone or grain of one of the floors, ensures a harmonious shift.
Stone to Carpet
Often seen in luxury homes where living areas might feature stone flooring and bedrooms boast carpets, the drastic change in material and texture demands a seamless transition.
A reducer transition, possibly with a metal finish, can add an elegant touch while providing a protective edge for the carpet.
When choosing transitions, it’s not just about the practicality but also about design aesthetics.
Always consider the overall look and feel of the space, ensuring the transition doesn’t just fit but accentuates the beauty of both flooring types.
The Technical Side: Proper Installation Techniques
Creating a seamless flooring transition isn’t merely about selecting the right type.
The installation process plays a pivotal role in determining the longevity, functionality, and aesthetic appeal of the transition.
Here’s a comprehensive breakdown of the technical side of things:
Preparation
Surface Leveling
Before laying down any transition, the surface needs to be perfectly level.
Uneven surfaces can lead to trip hazards or uneven wear on the transition material.
Using a level tool, inspect the floor area where the transition will be placed.
If there are disparities, you might need to sand (for raised areas) or fill (for dips) to create an even surface.
Underlayment
Especially vital for transitions involving laminate or hardwood, underlayment serves multiple purposes.
It provides a cushion, offers sound insulation, and can act as a moisture barrier.
Choosing the right underlayment thickness and material is essential to ensure the transition sits perfectly between the two flooring types.
Precision Cutting
Selection of Tools
Depending on the transition material, specific tools might be required.
For wood or laminate transitions, table saws or miter saws ensure clean cuts.
For metal or vinyl transitions, a sharp utility knife or metal shears might be more appropriate.
Measurement
Measure twice, cut once. It’s a golden rule in carpentry that holds true for flooring transitions.
Ensure you have precise measurements of the space and always factor in a little extra for potential mistakes or adjustments.
Technique
When cutting, especially for materials like wood, always cut slightly outside the marked line (to allow for sanding) and at a consistent speed to prevent splintering or uneven edges.
Securing the Transition
Adhesive Solutions
Some transitions, especially those on a level plane like T-Molding, might use adhesive strips or glue.
Ensure the adhesive is compatible with both flooring materials and is spread evenly to avoid any bumps.
Mechanical Fastenings
For transitions that need more security, such as reducers or stair nosings, mechanical fasteners like nails or screws might be necessary.
When using these, ensure they’re countersunk and, if visible, match the finish of the transition for a seamless look.
Floating Technique
Certain transitions, especially with floating floors like laminate, might not be physically attached to the floor.
Instead, they’re held in place by the tight fit between the two flooring types.
Ensure these are cut precisely and are snugly fit to prevent movement.
Getting the technicalities right during the installation process ensures not only a beautiful finish but also guarantees the longevity and functionality of the flooring transition.
Proper techniques mitigate potential issues down the line, ensuring the transition remains a cohesive part of the flooring for years to come.
Common Mistakes to Avoid in Flooring Transitions
Seamless flooring transitions are as much about knowing what to do as they are about knowing what not to do.
Despite the best intentions, both professionals and DIY enthusiasts can occasionally make mistakes.
Here’s a guide to the most common pitfalls and how to steer clear of them:
Overlooking Height Differences
One of the most frequent mistakes is not accounting for slight differences in floor height.
This oversight can result in trip hazards or visible gaps.
Always ensure you’ve chosen the correct transition type (e.g., a reducer for differing heights) to cater to these variations.
Mismatched Materials and Colors
Using a transition material that clashes with one or both flooring types can be jarring to the eye.
It’s essential to consider the broader design picture.
Ensure the transition complements both flooring materials, in texture, color, and style.
Skipping Proper Preparation
As with many installation projects, the adage “failing to prepare is preparing to fail” rings true.
Neglecting to level the surface or not using an underlayment where necessary can cause long-term issues with the transition’s stability and appearance.
Improper Cutting Techniques
Whether it’s using the wrong tools or hurrying the cutting process, imprecise cuts can lead to ill-fitting transitions.
This can result in gaps or overlaps that not only look unappealing but can also cause functional problems down the line.
Not Accounting for Expansion and Contraction
Especially relevant for transitions involving materials like laminate or hardwood, failing to leave room for natural expansion or contraction can lead to buckling or gaps.
Always follow the manufacturer’s guidelines regarding spacing and expansion gaps.
Using the Wrong Adhesive or Fasteners
Different flooring types might require specific adhesives or fasteners.
Using the wrong kind can result in weak bonds or even potential damage to the floor.
Always ensure you’re using products compatible with the flooring and transition materials.
Neglecting Moisture Barriers
In areas prone to moisture, like where tile meets carpet near a bathroom, neglecting to use a moisture barrier can be a costly oversight.
Water seepage can damage both the transition and the floor, leading to mold growth or structural damage.
Forgetting End-Caps in Doorways
Transitions in doorways or areas where the floor ends should have end-caps or a finishing piece.
Forgetting these can leave an unfinished look and expose the transition to potential damage.
Expert Tips
Always plan out the entire transition process before starting, considering both the aesthetic and functional aspects.
When in doubt, consult manufacturers’ guidelines or seek expert advice.
A little extra time spent in the planning and preparation stages can save a lot of time, money, and hassle later.
In the end, mastering flooring transitions is about understanding the unique characteristics of each flooring material and ensuring they’re unified seamlessly.
Avoiding common mistakes and being meticulous in your approach will ensure a long-lasting, beautiful transition that elevates the entire space.
Conclusion – Flooring Transition Types
Choosing the right flooring transition types goes beyond mere functionality.
It’s an art that, when mastered, accentuates the overall ambiance of a space.
Through my years in the industry, I’ve witnessed how a well-executed transition can breathe life into an area, proving it’s not just about making two floors meet; it’s about making them harmoniously unite.